1. Introduction
In this article, we’ll be implementing a simple Continuous Delivery pipeline with Jenkins, Marathon and Mesos.
First, we will give a high level overview of the technology stack and architecture, with an explanation of how everything fits together. Following that, we’ll move onto a practical, step by step example.
The outcome of this will be a fully automated Jenkins pipeline, deploying our application to our Mesos cluster using Marathon.
2. Overview of Technology Stack
When working with containers and microservice architectures, we face new operational problems that we wouldn’t have done with more traditional stacks.
For example, when deploying to a cluster, we have to deal with scaling, failover, networking and more. These difficult, distributed computing problems, can be solved with distributed kernels and schedulers, like Apache Mesos and Marathon.
2.1. Mesos
Mesos, in simplest terms, can be seen as the single server where our applications will be run. In reality we have a cluster, but it’s this abstraction that makes it so useful.
2.2. Marathon
Marathon, is the framework which is used to deploy our applications to Mesos, solving difficult problems for us (health checking, auto-scaling, failover, monitoring etc).
3. Setup and Installation
This article assumes you already have Jenkins, Mesos and Marathon running. If this is not the case, consult the official documentation for each of them to learn how to set them up. Without this, you won’t be able to implement any of the steps in the guide.
4. Our Delivery Pipeline
We shall be creating the following Jenkins pipeline:

There’s nothing particularly complex about this approach – it’s synonymous to the flow you of most modern CD pipelines. In our case, building will mean containerising the application, and deploying will mean using Marathon to schedule it on a Mesos cluster.
5. Testing and Building our Application
The first step is to build and test our application. To keep things simple, the application we are going to be working with is a Spring Boot application. Because of this, our resulting artifact will be an executable jar. It won’t have any external dependencies other than the JRE, making it very simple to execute.
5.1. Creating Our Job
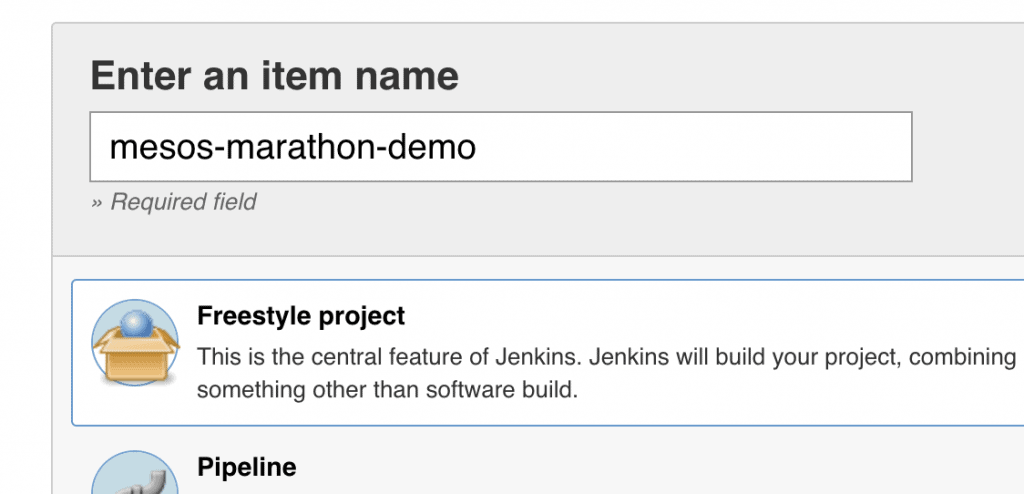
The first thing we want to do is create our Jenkins job. Let’s select “New Item” in the left hand navigation bar, then select create a freestyle project, naming it “marathon-mesos-demo“:
5.2. Integrating with Git
Next, let’s configure it to clone the Github repository containing our application:
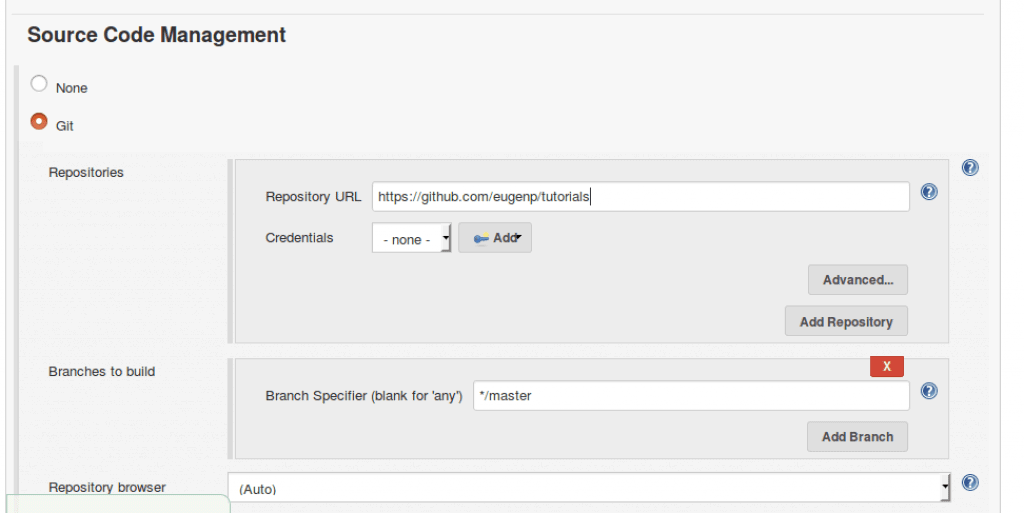
For the sake of simplicity, our repository is public, meaning that we are able to clone over https. If this wasn’t the case and we were cloning over SSH, there would be an additional step to set up an SSH user and private key, beyond the scope of this article.
5.3. Setting up Build Triggers
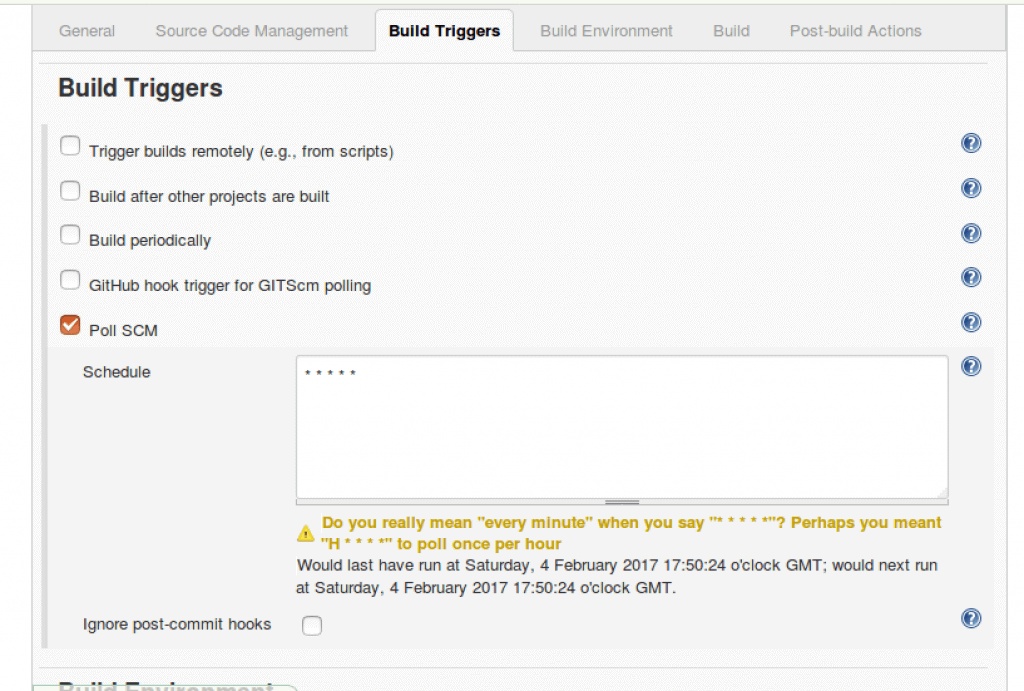
Next, let’s set up some build triggers so our job will poll git for new commits every minute:
5.4. Generating our Build Script
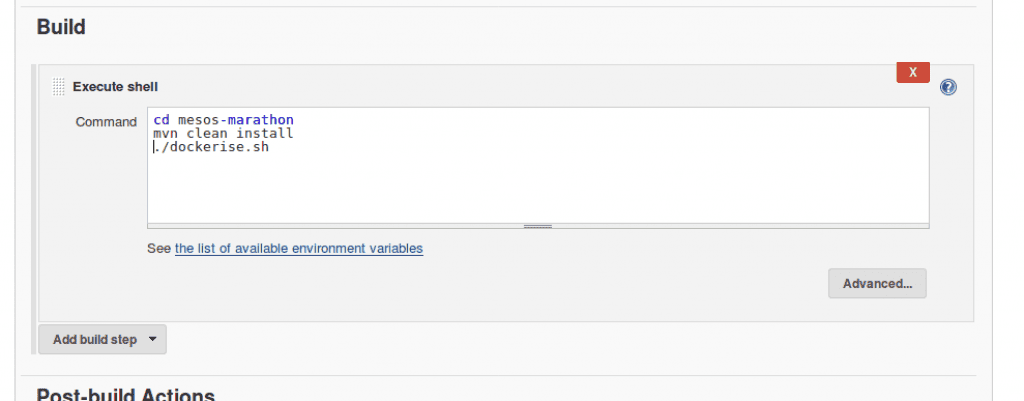
We can now tell our job to execute a shell script when it runs. As we are working with a simple Spring Boot Maven project, all we need to do is run the command “mvn clean install“. This will run all the tests, and build our executable jar:
5.5. Building our Project
Now we’ve set up the beginning of our pipeline, let’s trigger it manually by clicking “Build Now” on the job. Once the job is finished, we can confirm it has passed by it being marked as blue.
6. Containerizing our Application
Let us move onto the next stage of our pipeline, which is packaging and publishing our application with Docker. We need to use Docker as containers are specifically what Marathon manages. This isn’t unreasonable, as virtually anything can run in a container. It’s easier for a tool like Marathon to work with the abstraction granted by these.
6.1. Creating the Dockerfile
First, let’s create a Dockerfile in the project root. Essentially, a Dockerfile is a file containing instructions to the Docker Deamon on how to build an image:
FROM openjdk:8-jre-alpine
ADD target/mesos-marathon-0.0.1-SNAPSHOT.jar app.jar
EXPOSE 8082
ENTRYPOINT ["java","-jar","/app.jar"]
The image we are building is simple – all it contains is an executable jar, and a shell command which will execute it when the container starts. We also have to make sure that we are exposing the port that our application will listen on, in this case ‘8080’.
6.2. Publishing the Image
Now that we are able build our image, let’s create a simple bash script which builds and publishes it to our private Docker Hub repository, and put it in our project root:
#!/usr/bin/env bash
set -e
docker login -u baeldung -p $DOCKER_PASSWORD
docker build -t baeldung/mesos-marathon-demo:$BUILD_NUMBER .
docker push baeldung/mesos-marathon-demo:$BUILD_NUMBER
You might need to push your image to the public docker registry or your private one.
The $BUILD_NUMBER environment variable is populated by Jenkins, incrementing with every build. Although slightly brittle, it is a quick way of getting each build to increase in version number. The $DOCKER_PASSWORD is also populated by Jenkins, and in this case we will make use of the EnvInject plugin in order to keep it secret.
Whilst we could store this script directly in Jenkins, it’s better practice for it to remain in version control, as it can then be versioned and audited alongside the rest of our project.
6.3. Building and Publishing on Jenkins
Now let’s modify our Jenkins job so it runs “Dockerise.sh” after building the jar:
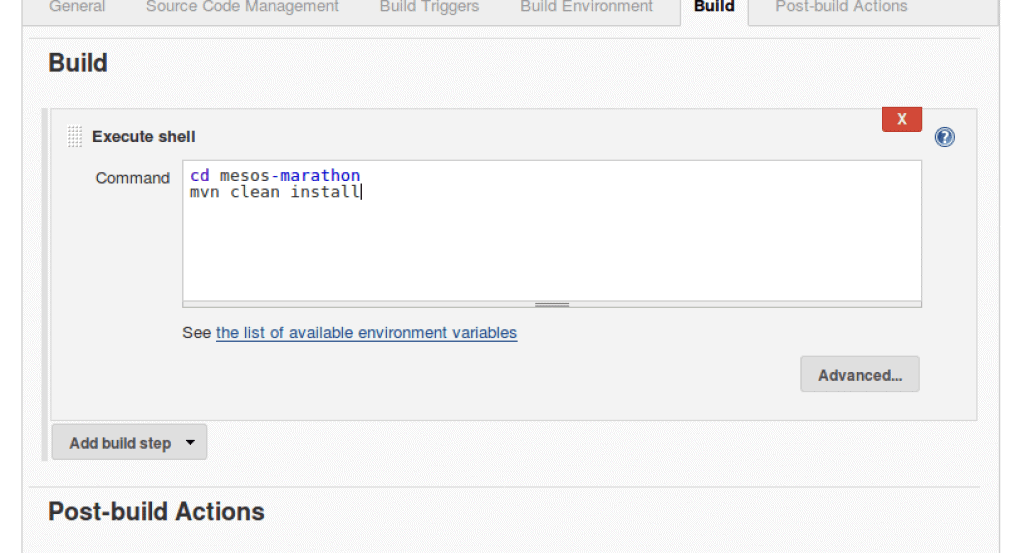
And then, let’s run our job to confirm again, confirming everything is working by it going blue.
7. Deploying our Image
Our pipeline is nearly complete. There is only one more stage, which is to use Marathon to deploy our application to our Mesos cluster.
Jenkins comes with a “Deploy with Marathon” plugin. This acts as a wrapper around the Marathon API, making it easier than it would be when working with traditional shell scripting. You can install it via the plugin manager.
7.1. Creating our Marathon.json file
Before we can use the Marathon plugin, we need to create a “marathon.json” file, and store it in our project root. This is because the plugin is dependent on it.
This file: “marathon.json” contains a Mesos Application Definition. This is a description of a long running service (application) that we want to run. Ultimately, the Jenkins Marathon plugin will POST the contents of the file to the Marathon /v2/apps endpoint. Marathon will then in turn schedule the defined application to run on Mesos:
{
  "id": "mesos-marathon-demo",
  "container": {
    "type": "DOCKER",
    "docker": {
      "image": "",
      "network": "BRIDGE",
      "portMappings": [
        { "containerPort": 8082, "hostPort": 0 }
      ]
    }
  }
}
This is the simplest configuration we can give for a containerized application.
The property: “portMappings” needs to be set correctly in order to make our application accessible from our Mesos slave. It basically means, map the container port 8082, to a random port on the host (mesos slave) so we can talk to our application from the outside world. After deploying our application, Marathon will tell us what that port used.
7.2. Adding a Marathon Deployment Build Step
Let’s add a Marathon Deployment post build action to our job:
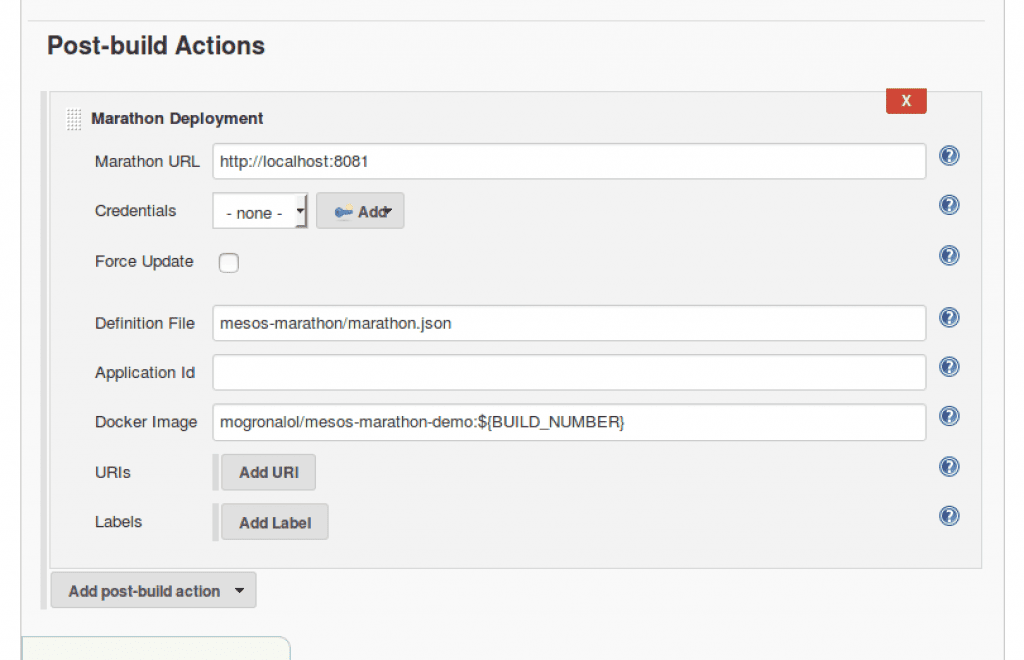
Notice we’re telling the plugin where Marathon is running, in this case ‘localhost:8081’. We’re also telling it the image we want to deploy. This is what the empty “image” field in our file get’s replaced with.
Now we’ve created the final stage of our pipeline, let’s run our job one more time and confirm that it’s still passing, this time with the extra step where it sends our application to Marathon.
7.3. Verifying our Deployment in Marathon
Now it’s been deployed, let’s take a look in the Marathon UI:

As we can see, our application is now shown in the UI. In order to access it, we just need to check what host and port it has been assigned:
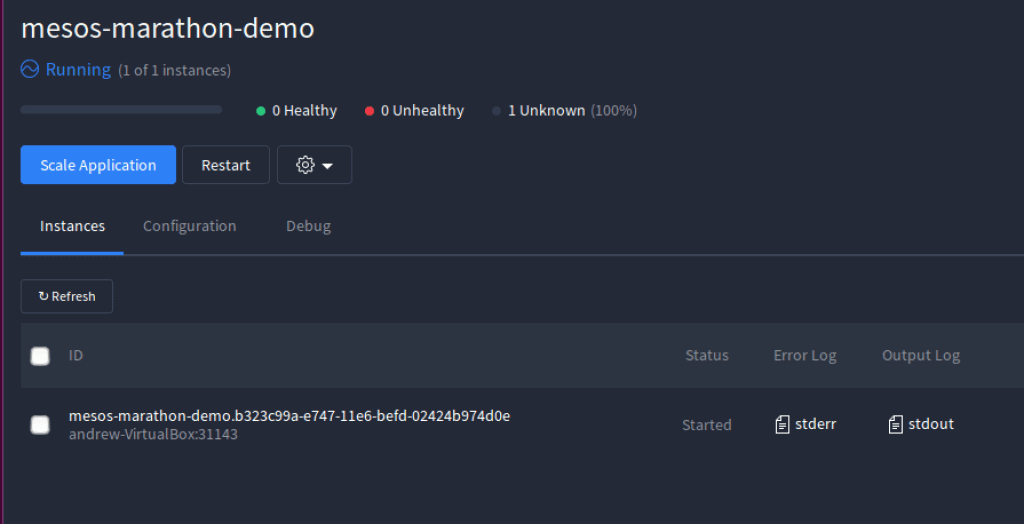
In this case, it’s been randomly allocated the port 31143 on localhost, which will internally map to port 8082 in our container as configured in the application definition. We can then visit this URL in our browser to confirm the application is being served correctly.
8. Conclusion
In this article, we’ve created a simple Continuous Delivery pipeline using Jenkins, Marathon and Mesos. Whenever we push a change to our code, it will be running in an environment a few minutes later.
Later articles in this series will cover more advanced Marathon topics, such as application health checking, scaling, failover. Other use cases for Mesos, such as batch processing may also be covered.
The source code for our application is available on over on GitHub; this is a Maven project which should be able to run as is.