1. Overview
When working with Java in the Eclipse IDE, ensuring the correct Java version is essential for compiling and executing code accurately. Eclipse simplifies this process by providing straightforward methods to check and configure the Java version it uses. In this tutorial, we’ll walk through the steps to determine the Java version running in Eclipse.
2. Java in Eclipse: Environment vs. Project Configuration
It’s important to differentiate between the Java version used within Eclipse itself, which may differ from the Java version configured for specific projects within Eclipse.
While Eclipse’s own Java version impacts its operations and functionalities, individual projects within Eclipse can be configured to use different JDKs or JREs based on project requirements. This allows us to tailor the Java environment for each project, ensuring compatibility and optimal performance. Therefore, while it’s crucial to determine the Java version running in Eclipse, we should also be mindful of project-specific Java configurations to avoid compatibility issues and ensure smooth development workflows.
3. Checking Which Java Version Is Running in Eclipse
In this section, we’ll explore how to determine the Java version currently running in the Eclipse IDE.
3.1. Using the Eclipse IDE Installation Details
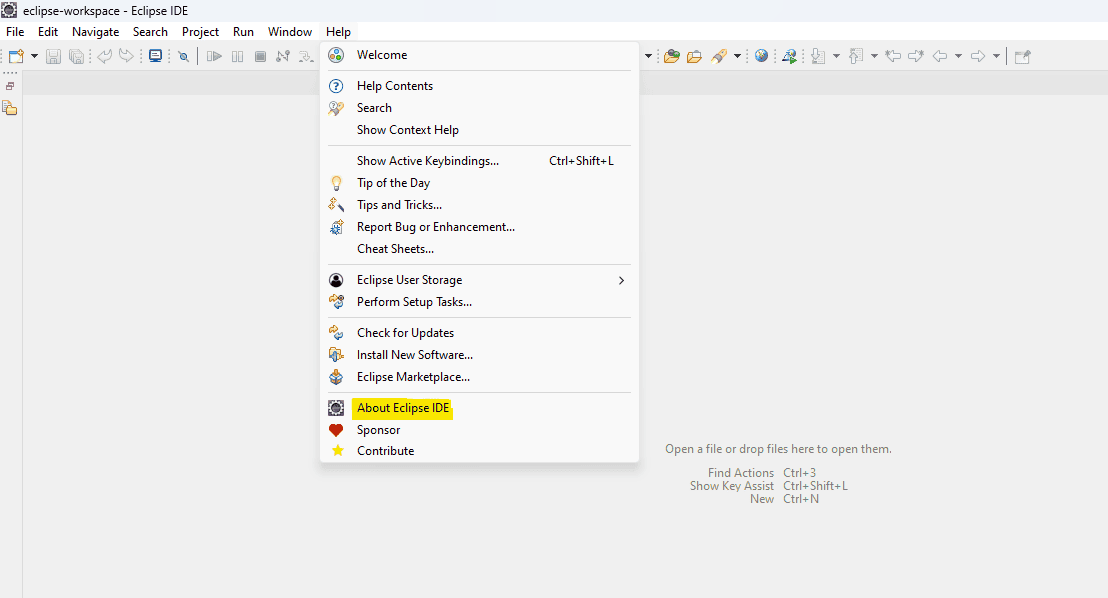
To start, let’s open the Eclipse IDE and then navigate to “Help” in the menu bar. Then, we can select “About Eclipse IDE“:

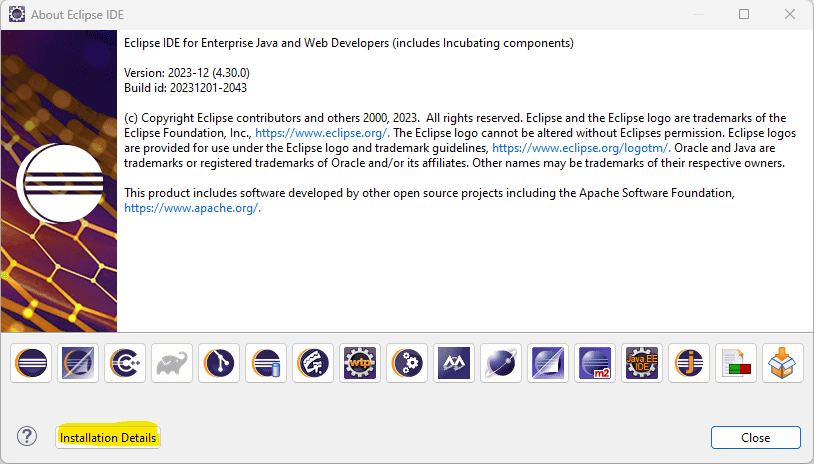
Within the “About Eclipse IDE” dialog box, let’s click on the “Installation Details” button:

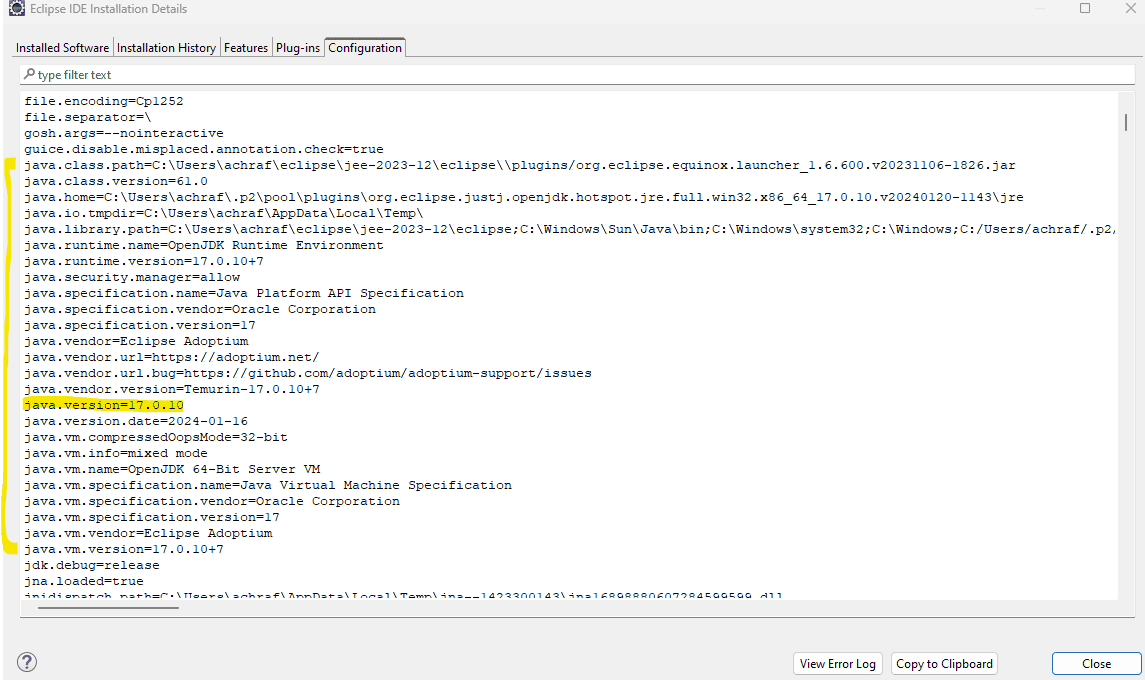
In the ensuing popup, we switch to the “Configuration” tab:

Under the Configuration tab, we can locate essential Java properties that provide valuable information about the Eclipse IDE Java configuration. These properties include:
- java.version: specifies the Java Development Kit (JDK) version being utilized
- java.runtime.version: indicates the version of the Java Runtime Environment (JRE) currently in use
- java.vm.version: specifies the version of the Java Virtual Machine (JVM)
In the above example, the Eclipse IDE is running under Java version 17.0.10.
3.2. Checking the eclipse.ini File
Another way to determine the Java version used in Eclipse is to inspect the eclipse.ini file. Typically located within the Eclipse installation directory, this file contains configuration settings for Eclipse IDE, including the Java configuration.
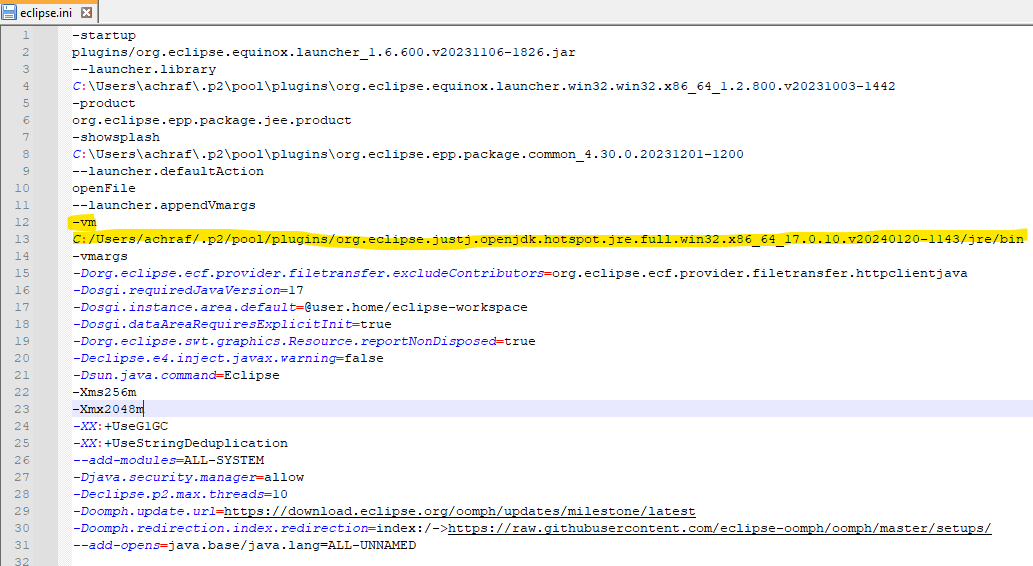
Let’s open this file in a text editor and locate the line that starts with -vm, which specifies the location of the Java executable that Eclipse should use:

While the -vm option in the eclipse.ini file specifies the path to the Java executable, it doesn’t directly reveal the exact Java version used in Eclipse IDE. For instance, the path specified in our eclipse.ini file provides insights suggesting Eclipse’s usage of Java 17. However, a path like C:\Program\Java\jdk\bin offers no indication regarding the Java version in use.
To determine the exact Java version, we need to navigate to the path defined in the -vm option of the eclipse.ini file and execute java –version in a command prompt.
The -vm option provides flexibility as we can modify the associated path to point to a different JDK installation directory. Also, removing these lines allows Eclipse to use the Java version specified in the PATH system environment variable.
3. Conclusion
Identifying the Java version running in Eclipse is essential for us to ensure compatibility and leverage the latest language features.
By following the methods in this article, we can easily determine the Java version configured within Eclipse. This understanding empowers us to make informed decisions while developing Java applications within the Eclipse IDE.


